We’ve updated this post with a beautiful video breaking everything down over here: Unlock the Banjo in Three Easy Chord Shapes
In my four decades teaching banjo, one of the most common stumbling blocks for students seems to be finding and identifying chords. Learning your banjo chord inversions will be the building blocks to mastering the banjo fretboard.
This trouble for beginning banjo students shouldn’t come as a surprise. After all, most banjo instruction (especially during the first few months) typically involves learning picking patterns. And usually that’s pretty much it. Sure, maybe one or two chords might be thrown into the mix for good measure, a few basic licks as well, but generally speaking during the first few months of instruction the focus is on the picking hand. Then, once the picking starts to feel comfortable, the student embarks on a few basic tunes. Then some more tunes. And more tunes. And while they might learn a chord or two within the context of a song, for the most part the skill of locating and identifying chords up and down the banjo fretboard is rarely, if ever, touched upon.
The G Major Chord Inversions on Banjo
So let’s take a crack at solving that mystery here and now. And to kick things off, let’s start with the most commonly encountered chord in all of bluegrass, the G major chord. (Note: most people will simply refer to this as a G chord and omit the “major” part; when we identify chords with a letter only and omit the major/minor qualifier, it’s assumed we’re dealing with major chords. If we were dealing with minor chords, we would include the word “minor” after the letter.)
When locating any major chord on the banjo (yes, this goes for G as well), it’s important to note that we’re dealing with three different chord shapes or inversions. That’s it, only three shapes. Kinda makes things seem less overwhelming when you look at it that way, doesn’t it?
The Open G Chord on Banjo
The F-shaped G Chord Inversion on Banjo
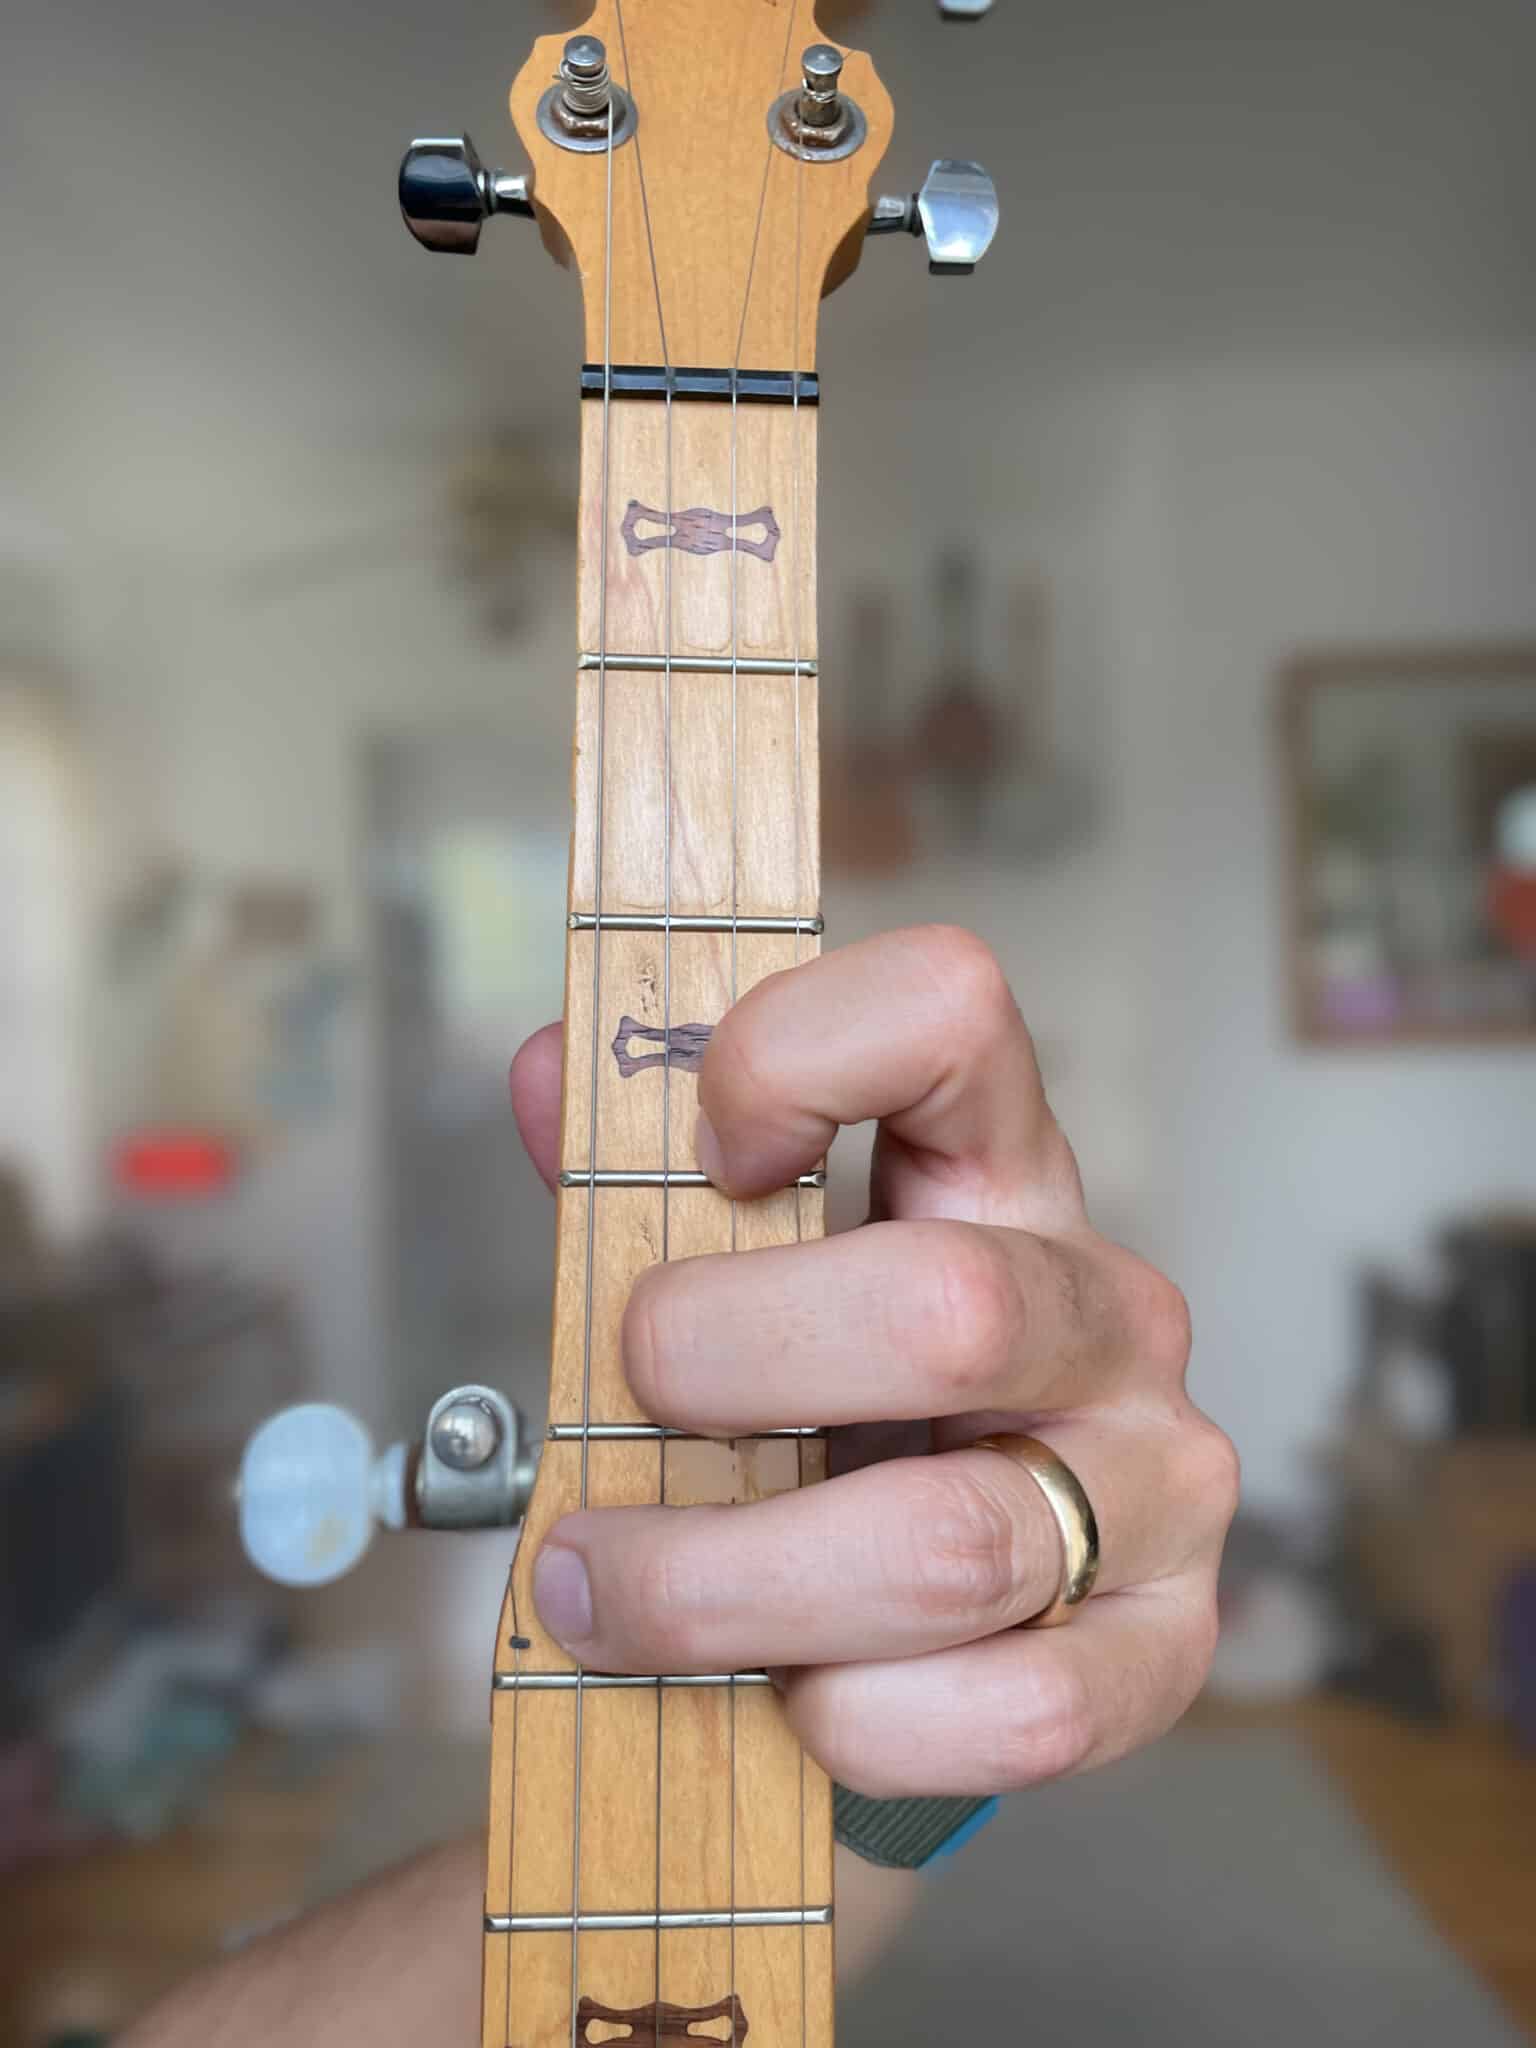
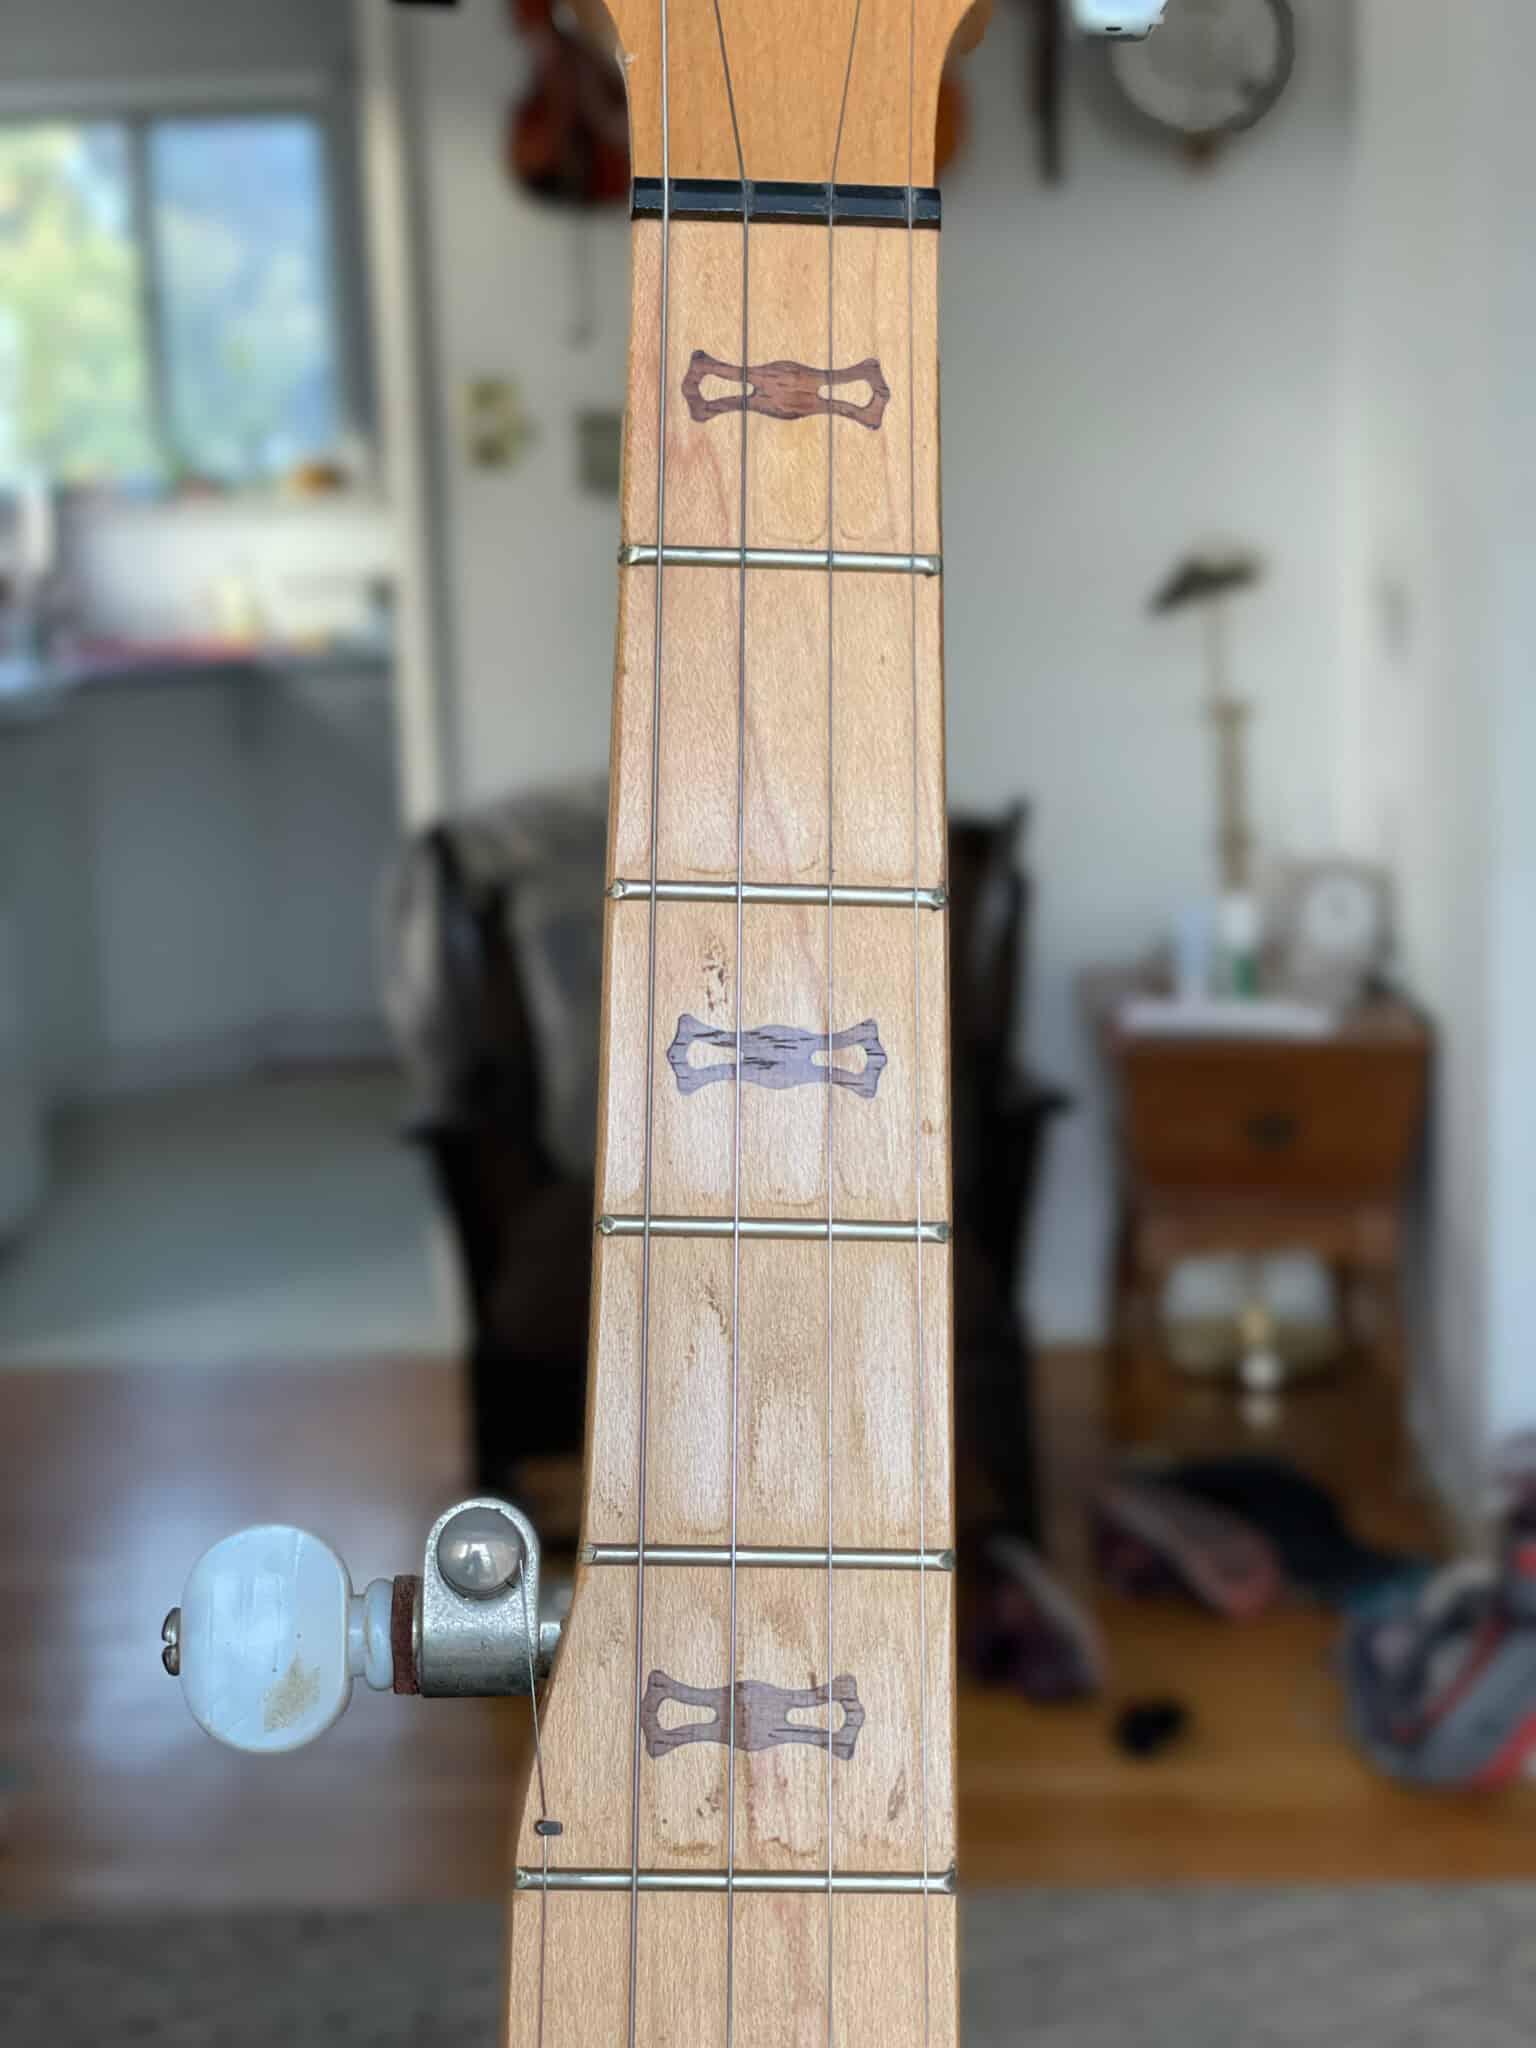
Ok, so we’ve got the open G chord covered. Now, moving up the neck, where might we find the next G chord inversion? You need look no further than the fifth fret. Place your pinky on the fifth fret of the first string and your ring finger on the fifth fret of the fourth string. We’ll “build” the chord from that fret. Next, your index will go on the third fret of the second string and your middle on the fourth fret of the third string. Got it? Now look at the shape of this chord. Recognize it? If you’ve already done some work with banjo chords, you might notice that its fretting (shape) is exactly like the F chord that we find two frets to the left. Since that F chord represents the first appearance of this particular chord shape on the banjo fretboard, the G chord that we just built on the fifth fret is typically referred to as an F shape G chord. That’s our first fretted inversion of the G chord on the fretboard. Incidentally, the note that bears the name of this chord shape (in this case, the G note) is located on the fifth fret first string and fifth fret fourth string. A G note is the root of a G chord.
D-Shaped G Chord Inversion on Banjo

The A-shaped G Chord Inversion (Bar) on Banjo

The G-Chord Inversions Repeat
So, what happens after we locate this third and final inversion of our G chord? The cycle begins all over again. The secret to mastering this cycle, or pattern, is knowing how many frets you need to travel up the fretboard to reach the next inversion. So, from our F shape G chord (which we’ve already located on the fifth fret) we move the entire shape four frets up the fretboard, trade strings with our index and middle fingers, and now we’ve got our D shape inversion. From here (the ninth fret) we move up the neck three frets and we find our bar shape inversion. If you want to keep moving up the fretboard from here, take your index finger and move it five frets up the fretboard to the seventeenth fret. From this fret, we’ll build another F shape inversion. So, to simplify, the pattern is always: F shape (> four frets up the neck) = D shape (> three frets up the neck) = bar shape (> five frets up the neck) = F shape…and on and on till you reach the end of the fretboard. And remember, it’s this same pattern with ANY major chord, plus you can begin with ANY of the the shapes described, not just the F shape inversion.
I can’t emphasize enough how important it is to get this pattern ingrained in your fingers (and in your brain). For practice, I’d recommend memorizing all the different inversions of the G chord starting with the open chord, then moving up the neck. Practice this pattern until it becomes part of your muscle memory. Then try it for other commonly used chords in bluegrass like D and C. It’ll definitely come in handy when accompanying other pickers in a jam setting. Integrate it into a consistent practice regimen and it will help you become more conversant in chord identification. And then, most importantly, the fretboard will start to seem less of a foreign language to you.
Happy practicing!